MyDataHelps Designer employs a sophisticated team- and institution-based access control system. A single individual may be assigned to multiple teams, projects, or institutions within a workspace, based on their specific responsibilities. For example, a coordinator in a multi-site project may be assigned to the project team at their specific site or institution, meaning they have access only to participant information at their location.
Setting up Teams
User permissions within MyDataHelps Designer are controlled by a user’s assigned team. In order to get started with permissions, you’ll want to create teams and then assign permissions to those teams.
An “Everyone” team exists for all workspaces, with some defaulted permissions that you should review and potentially adjust. For a workspace with many users, it is recommended to remove all permissions from the “Everyone” team until users have been assigned to a more specific team.
Creating a Team
- From Workspace Settings, click on "Teams”.
- To add a new team, click “Add Team”.
- Provide a name for your new team, e.g. Study Coordinators.
- Check off all of the appropriate permissions for this team. See below for an overview of permissions, including recommended teams & permissions.
- Click “Save” once you are satisfied with the selected permissions.
- If necessary, you can edit a team’s permissions by clicking the red trash can icon. If you need to delete a team, click the icon.
Demonstration: Creating a Team
Permissions
Now that you have a new team, you’ll want to assign permissions.
- Workspace Permissions: Apply to all notifications and settings within the workspace.
- All Project Permissions: Apply to all projects within the workspace.
- Project-specific Permissions: Apply only to specified projects. Your workspace must have projects for this to be available. Select “Add Permissions for a Project” and “Add Project” to enable.
- Segment-specific Permissions: Apply only to specific segments within a project. To apply these permissions you must:
- Have projects that have segments.
- Have “View/Manage Segment Participants” checked within the specified project.
- Institution-specific Permissions: Apply to individual users to restrict the participants that they can view. To apply these permissions you must:
- Enable institutions for your project.
- Uncheck "View/Manage All Institutions" within All Project Permissions.
- Add permissions for a specific project to the team permission set.
- Assign institution(s) to specific users.
- Participant Details Tab Permissions: Apply to individual users to restrict which tabs are visible in the Participant Viewer. To apply these permissions you must:
- Uncheck "View All Participant Detail Tabs" within All Project Permissions.
- Add permissions for a specific project to the team permission set.
- Check "View Participant Detail Tabs" for the project, and select the tabs this team should see.
Demonstration: Segment-Specific Permissions

Permissions Reference
The following tables summarize what each permission controls within the workspace/project.
Workspace Permissions
Project Permissions
Suggested Teams/Roles
The following teams are recommended for any given workspace.
Managing Users
After setting up your teams, you’re ready to add users to those teams and edit institution permissions.
You can quickly navigate to the User Access page for inviting and adding colleagues to your projects and workspace by selecting "Invite Colleagues" from the Settings drop-down in the top right.

- From Workspace Settings, click “User Access”.
- In the bottom right, enter the username or email address for the user and click “Add User to Workspace”.
- Check the end user being added is correct and click “Confirm”.
- Select the appropriate team from the “Add to Team” dropdown.
- If you are running a multi-site project, select the appropriate institution from the “Institution” drop-down.
- If necessary, click the gray trash can item to delete a user. You can also click the “X” in their assigned team or institution to remove them from that team or institution.
Users can be added to multiple teams and institutions to ensure they have all necessary permissions. For example, if you are using our suggested teams, you would likely want to assign someone on the Project Administration team to the Study Coordination and Data Management teams as well so that they can oversee the project, interact with participants when needed, and export data. When a new workspace is created, the "Everyone" team will have the "View/Manage Participants in All Institutions" permission selected, meaning users will default to having access to all institutions unless set-up otherwise.
Demonstration: Managing Users

In the event that an workspace’s ownership needs to be transitioned to another user, you can click the “Transfer Ownership” button next to the appropriate user.
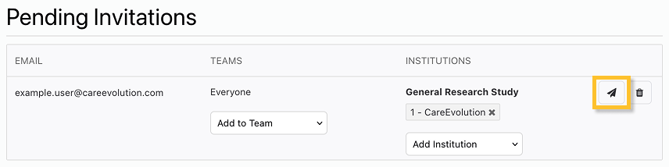
If you need to resend a workspace invitation to an already invited user, you can click the Resend Invitation button: