Please note that the consent survey building process has changed. This article should only be used for legacy consents, created prior to 22-Dec-2021.
Please refer to Creating a Consent Document and Consent Surveys for the current consent survey building process.
Each project requires a “Consent” survey to be configured before participants can join - this can be used to inform the participant about how their data may be used, assess eligibility, collect initial data, or any other things which you might want the participant to see or do before joining.
Unlike standard surveys, participants are prompted to complete the consent survey when joining a project, and must complete it before joining. For more information on consent, refer to ResearchKit's Informed Consent.
Creating a Consent Survey
Consent surveys can either be created from scratch, same as creating a standard survey, or you can download the Sample Consent from the survey store. To download the survey, click the download icon on the homepage, enter a survey name, and click Import, as shown below.
Using Consent Documents
Once you have downloaded or created your consent survey, you will need to update or add a consent document. A consent document is a multi-part document describing the terms and conditions of your project. Typical sections include:
- Overview
- Data Gathering
- Privacy
- Data Use
- Time Commitment
- Study Survey
- Study Tasks
- Withdrawing
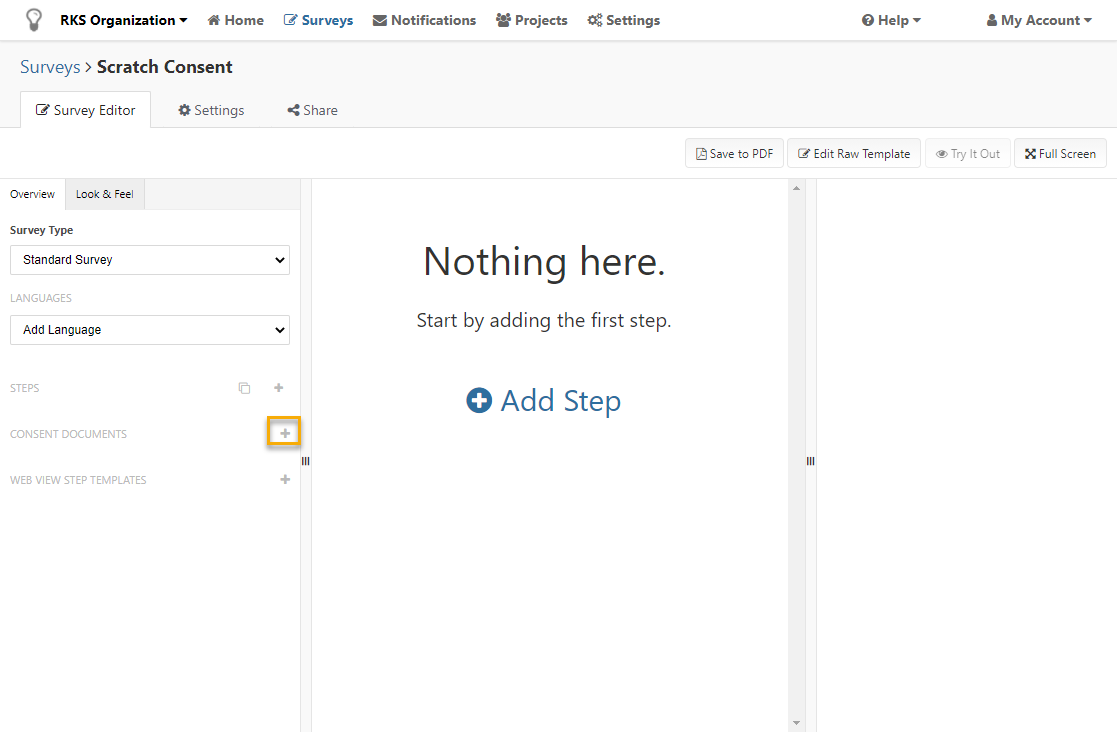
Adding a Consent Document
On the left side of the survey editor, below the list of steps, is a header for consent documents. Select the “+” button next to the header to add a new consent document.
Consent Document Properties
There are global properties to a consent document that you can modify:
Consent Document Sections
A consent document is made up of various sections, accessible via the “Sections” tab when you are editing a consent document.
When adding a new section, you can modify the following properties:

Signatures
To record an electronic signature with a Consent Review step, you must configure a signature for your consent document. These are visible via the “Signatures” tab when editing a consent document.

If you download the Sample Consent survey and update the consent document title or signature identifier, you will need to update the Visual Consent and Consent Review steps to point to the new title and identifier names.
Adding Consent Survey Steps
The consent can contain as many steps as you want. For example, you may add an instruction step or an eligibility question step with validation rules to prevent a participant from joining your project unless they state that they meet the necessary criteria. There are two steps, however, that are specific to consents: the Visual Consent Step and Consent Review Step.
Using the Visual Consent Step
The Visual Consent survey step presents these sections to the user in a nice, graphical manner in accordance with the ResearchKit visual consent model.

To use a Visual Consent step, simply add one to your consent survey and select the consent document it’s associated with.
Using the Consent Review Step
The Consent Review step lets the user review the entire consent document on a single screen and then acknowledge it. It can also be used to capture electronic signatures.

To use a Consent Review step, simply add one to your consent survey and select the consent document it’s associated with. If you want to capture an electronic signature, select one of the consent document’s signatures. You can also configure consent review to require the user to scroll all the way to the bottom before acknowledging.
Although the consent document can have multiple electronic signatures, each consent review step can only capture one.
When using the Consent Review Step, it is necessary to add validation rules using the "Validation" tab. The configuration below prevents users from moving forward if they click "Disagree" to the consent review. 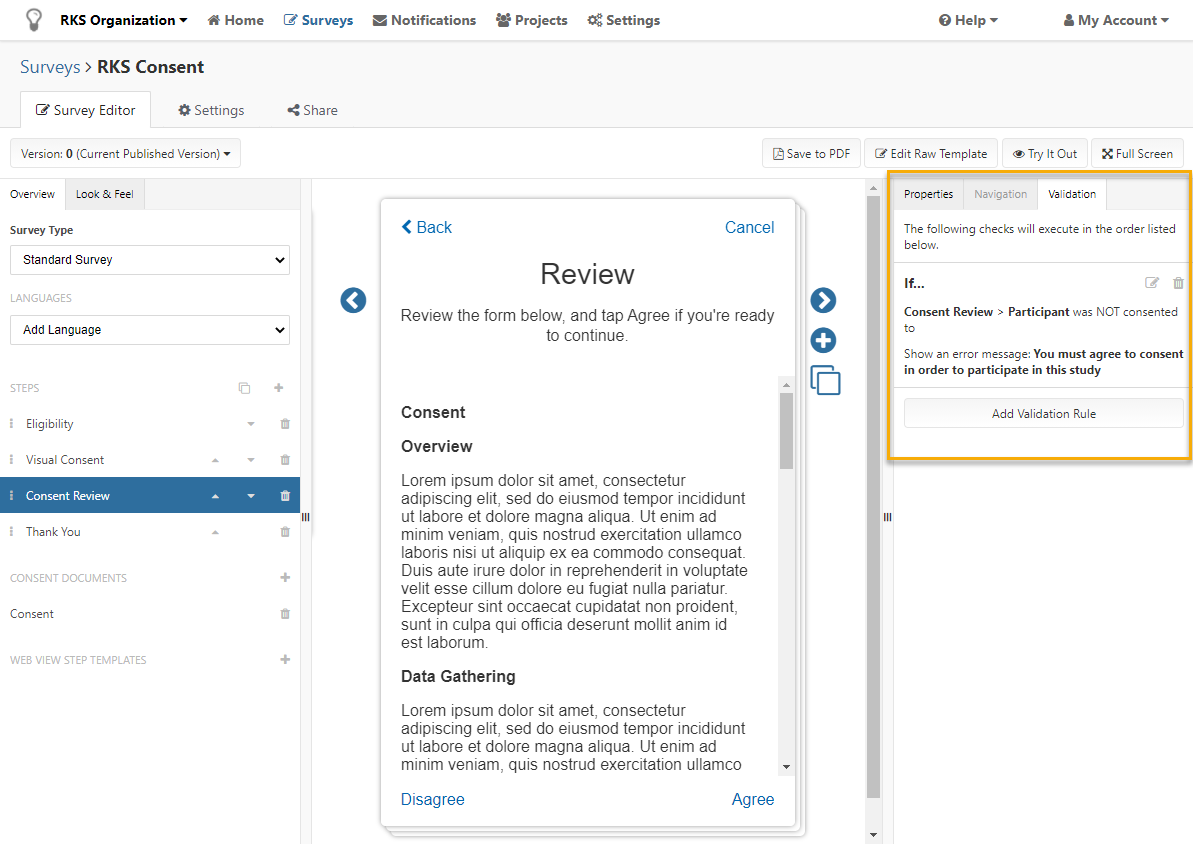
If you do not add validation rules to this step, participants will be able to enroll even if they disagree to the consent.
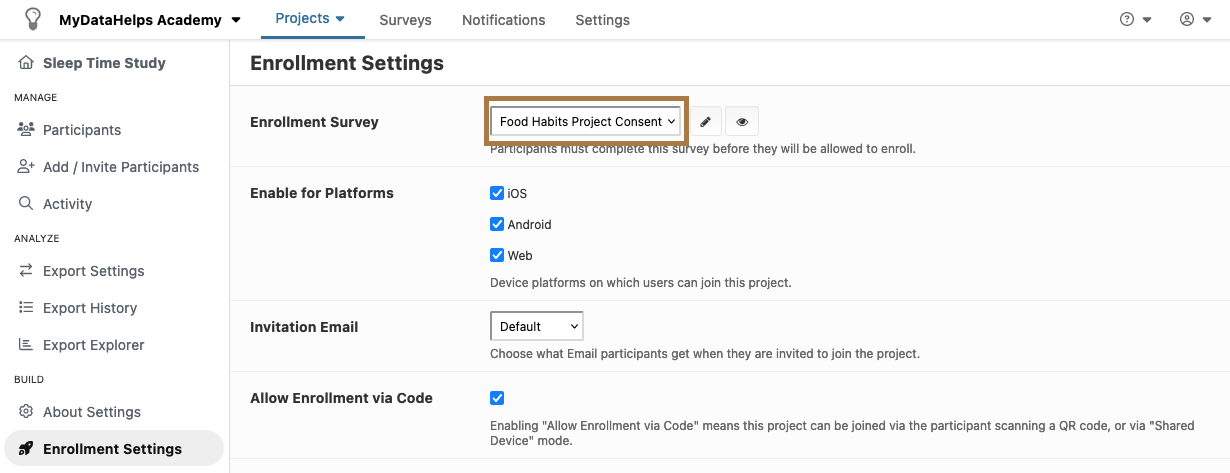
Adding the Consent to the Project
Finally, once you have published your consent survey, navigate to the enrollment settings screen and select it as your consent survey. Click Save at the bottom of the settings page to save your changes.